Showing posts with label Desserts. Show all posts

Wednesday, May 4, 2016

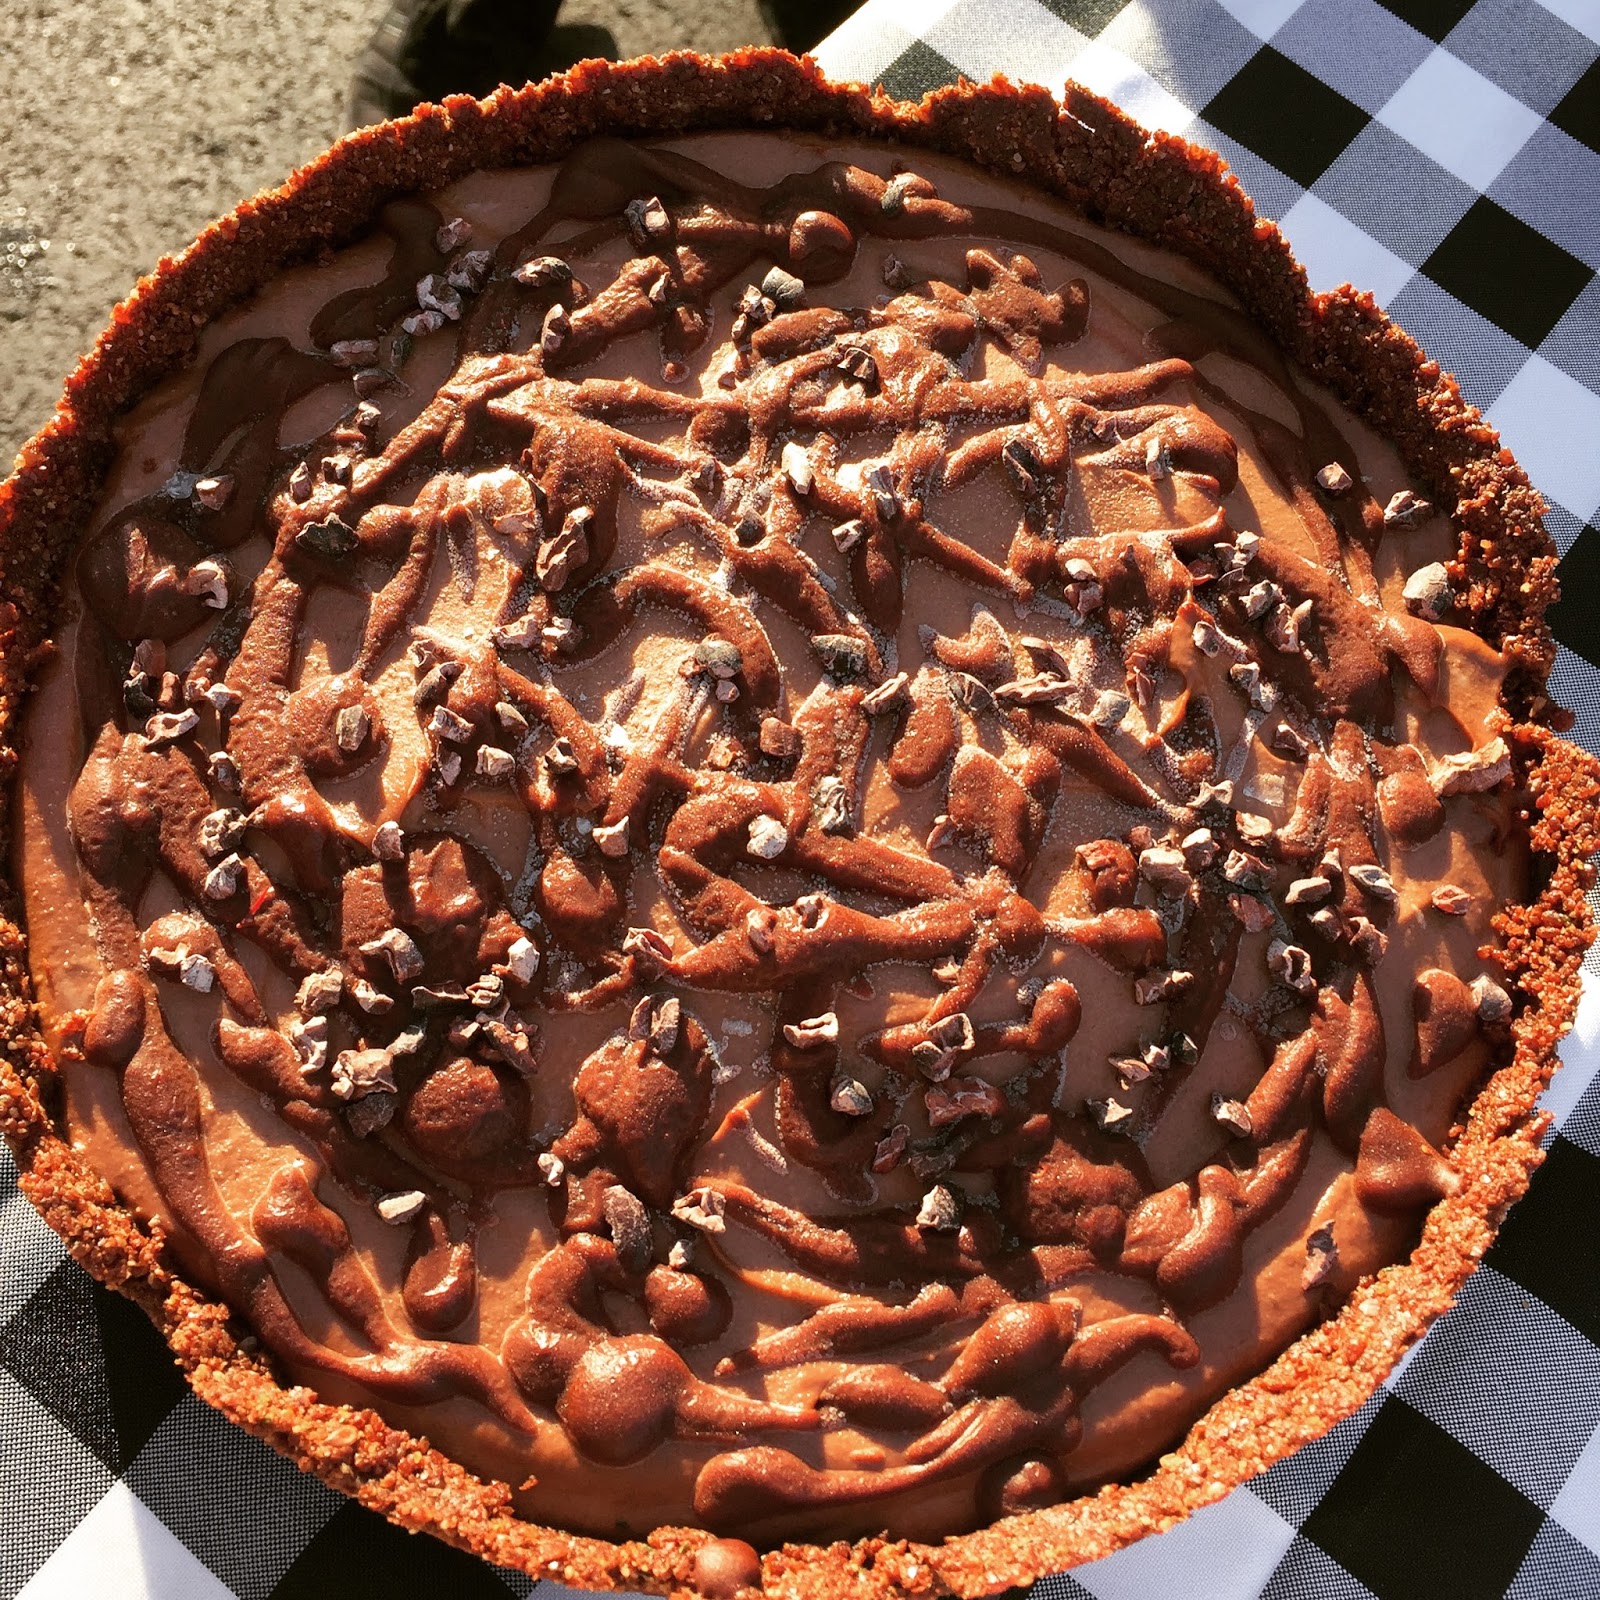
Recipe: Chocolate Peanut Butter Ice Cream Cake (Vegan + GF)


If you've read my blog before, you may know that I hate baking but I love pulling out the stops for a serious birthday cake.

There was Chris's 29th birthday German chocolate cake,


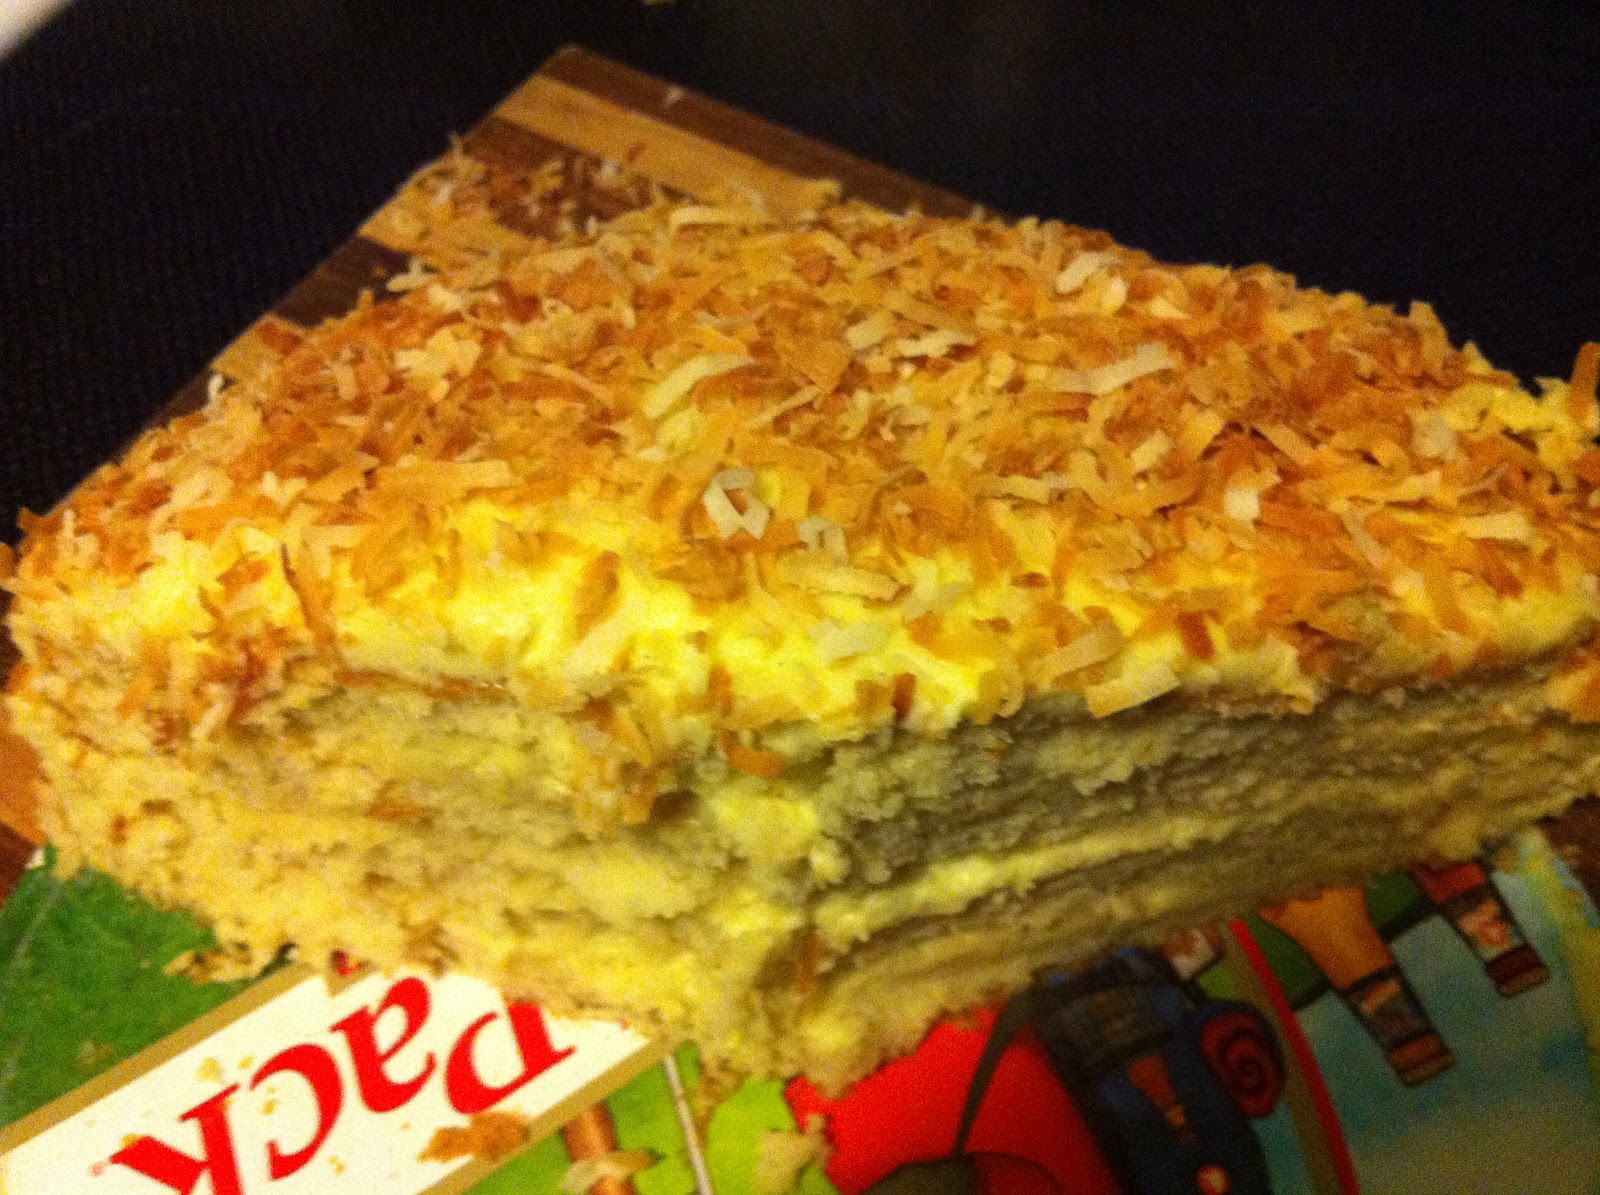
And his 30th birthday coconut layer cake.


There was Julie's vanilla buttercream cake.


I have no idea why I have no pictures of the finished cake product. But it was my first time using a Kitchenaid Mixer in all its glory. Man, did I hate those green grapes painted on my kitchen wall

Joe's mocha ice box birthday cake was served at a Revs tailgate.


Becca's funfetti birthday cake had all the sprinkles I could find in the store.


Never before have I attempted a vegan birthday cake! But a birthday needs a cake, even if the cake maker is dabbling in veganism.

I personally prefer ice cream cake over layer cake. I asked my parents for a Carvel cake for every birthday I can remember. So when I learned that Joe and Kyle would be traveling to Gillette Stadium for a New England Revolution game on Joe's birthday, I set out to make some semblance of an ice cream cake using no dairy.


I turned to the internet for guidance. What did you vegans do for inspiration before Google and Pinterest and Blogging? A quick Google search led me to Emily's recipe for deep dish chocolate peanut butter ice cream pie on her amazing blog This Rawsome Vegan Life. One look at her photographs and there was no turning back.

There is no baking involved in making this "ice cream" cake and it's made of pretty amazingly delicious real stuff. I modified Emily's original recipe only slightly, mostly because the spring form pan Steph loaned me was 9 inches and the one Emily used in her recipe was 7. You can adjust the crust and filling ratio as needed.


Chocolate Peanut Butter Ice Cream Cake (Vegan + Gluten Free)
Recipe adapted from This Rawsome Vegan Life
Makes one 9-inch cake (serves 10-12)

Ingredients
For the crust:
  • 1 1/3 cups pitted medjool dates
  • 2/3 cup hemp seeds
  • 1/3 cup flax meal
  • 1/3 cup almond meal
  • 3 tablespoons raw cacao powder
For the filling:
  • 4 frozen bananas
  • 1 1/3 cups pitted deglet or medjool dates
  • 2 cups raw cashews, soaked in water overnight
  • 2 tablespoons coconut oil
  • 1 1/4 cups almond milk (or non-dairy milk of choice)
  • 1/4 cup raw cacao powder
  • 2 tablespoons natural creamy peanut butter, plus a little extra for swirling in and topping. (My favorite brand is Teddie) 
For the chocolate sauce:
  • 2 tablespoons raw cacao powder
  • 2 tablespoons maple syrup
  • 1 tablespoon coconut oil

Cooking Directions
  1. Make the crust. Pulse the hemp seeds, flax meal, almond meal and 3 tablespoons cacao in a food processor until they become a rough flour. Add the dates and process until the mixture becomes sticky and soft. Press mixture into the bottom and up the sides of a spring form pan to make a uniform crust. Chill in the refrigerator.
  2. Make the chocolate sauce. In a small bowl, melt the coconut oil by microwaving for about 15 seconds. Whisk in the syrup and cacao powder until smooth. 
  3. Make the filling. Blend all filling ingredients until smooth, adding water or non-dairy milk as needed to achieve a creamy consistency. Spread filling evenly into your chilled crust, intermittently swirling in peanut butter and chocolate sauce. Drizzle peanut butter and chocolate sauce over the top of the cake. Place cake in freezer overnight or until frozen solid. When you're ready to serve, allow to thaw for a few minutes so the cake is creamy and easy to slice. Maybe eat it with some chili in a parking lot.

Friday, June 1, 2012

Birthday Toasted Coconut Cream Cake


I don't love cake. Neither does Chris. Sometimes it's too spongy. Sometimes it's too dry. Sometimes the frosting is too sweet. Sometimes all three of these things, unfortunately, are true.

But when birthdays come around, there is no alternative. There must be birthday cake! For Chris's birthday, I was determined to bake a cake that was creamy and flavorful and not too sweet. This toasted coconut cream cake fit the bill. Baking it was a serious undertaking. I dirtied half the dishes in the kitchen: a baking sheet, a saucepan, three bowls (including the mixer), two cake pans. Not to mention it took me half a day to bake. 

The effort was worthwhile and the cake was delicious. If you are a fan of coconut, this cake's for you. I followed the recipe exactly, with no modifications. If you're giving it a try, I have two suggestions:
1. Make the custard and simple syrup a day ahead to save yourself a lot of time.
2. I can't believe I'm saying this, but the buttercream frosting was a little too buttery and not quite sweet enough. I would increase the ratio of powdered sugar to butter if I made this again.


Here is Bobby Flay's recipe, unedited. It can be found at www.foodnetwork.com:

Throwdown's Toasted Coconut Cake with Coconut Filling and Coconut Buttercream

Recipe courtesy Bobby Flay, 2008

Ingredients

Toasted Coconut:

  • 2 cups sweetened flaked coconut

Coconut Simple Syrup:

  • 1 1/2 cups water
  • 1 tablespoon granulated sugar
  • 3/4 cup sweetened flaked coconut

Coconut Custard:

  • 3/4 cup whole milk
  • 3/4 cup unsweetened coconut milk
  • 1/2 vanilla bean, seeds scraped
  • 4 large egg yolks
  • 1/3 cup granulated sugar
  • 3 tablespoons cornstarch
  • 2 teaspoons coconut rum (recommended: Malibu)
  • 1/2 teaspoon pure vanilla extract

Coconut Filling:

  • 3/4 cup coconut custard (recipe above), cold
  • 3/4 cup very cold heavy cream

Coconut Buttercream:

  • 3 stick unsalted butter, softened
  • 1/3 cup confectioners' sugar
  • 3/4 cup coconut custard (recipe above) (cold)
  • Pinch fine sea salt

Cake:

  • 2 tablespoons softened butter, for pans
  • 2 1/4 cups cake flour, plus more for pans
  • 1 cup whole milk, at room temperature
  • 6 large egg whites, at room temperature
  • 1 vanilla bean, split and seeds scraped
  • 1/2 teaspoon pure vanilla extract
  • 1 3/4 cups granulated sugar
  • 1 tablespoon plus 1 teaspoon baking powder
  • 1 teaspoon fine sea salt
  • 12 tablespoons unsalted butter, cut into 12 pieces, slightly cold

For the toasted coconut:

Directions

Preheat oven to 325 degrees F.
Spread the coconut evenly onto a baking sheet and toast until lightly golden brown, stirring once, 8 to 10 minutes. Turn off the oven and let the coconut sit in the oven until very dry and crunchy, about 15 minutes longer.
Bring water and sugar to a boil. Stir in the coconut, remove from the heat and let sit for at least 30 minutes and up to 4 hours. Strain the liquid into a clean saucepan, bring to a boil and let cook until the mixture is slightly reduced, about 5 minutes. Let cool.

For the custard:

Combine the milks and vanilla bean and seeds in a medium nonreactive saucepan and bring to a simmer over low heat.
Whisk together the yolks, sugar and cornstarch in a large bowl. Slowly whisk the warm milk into the egg mixture then return the mixture to the pot over medium heat and bring to a boil, whisking constantly, until thickened. Scrape the mixture into a bowl and whisk in the rum and vanilla extract. Let cool to room temperature then cover with plastic wrap and refrigerate until cold, at least 2 hours.

For the filling:

Combine the custard and cream in a bowl and whip until soft peaks form.

For the buttercream:

Beat the butter and sugar in a stand mixer fitted with the paddle attachment until light and fluffy, about 4 minutes. Add the coconut custard and salt and beat until combined and smooth.

For the cake:

Preheat oven to 350 degrees F. Butter and flour 2 (9 by 2-inch) round cake pans and line bottoms with parchment paper.
Whisk together the milk, egg whites, vanilla bean seeds and vanilla extract in a medium bowl.
In the bowl of a mixer fitted with the paddle attachment, mix together the flour, sugar, baking powder and salt. With mixer running at low speed, add the butter, one piece at a time and continue beating until mixture resembles moist crumbs. Add all but 1/2 cup of milk mixture to crumbs and beat at medium speed until the mixture is pale and fluffy, about 1 1/2 minutes. With mixer on low speed, add remaining 1/2 cup of the milk mixture, increase speed to medium and beat 30 seconds more. Scrape sides of bowl and mix for 20 seconds longer. Divide the batter evenly between the cakes pan and smooth the tops using a rubber spatula.
Bake until a toothpick inserted into the center comes out with a few crumbs attached, 22 to 24 minutes. Cool in the pan on baking rack for 10 minutes. Run a small knife around the side of the pan and invert cakes onto the baking rack, removing parchment paper, and let cool completely, about 45 minutes.

To Assemble:

Using a long serrated knife, slice each cake horizontally into 2 layers. Reserve 1 of the flat bottom layers for the top of the cake. Place another layer on a cardboard round cut side up and brush with some of the coconut simple syrup. Spoon 1/3 of the coconut filling onto the cake and using a small offset metal spatula, spread it into an even layer, leaving a 1/2-inch border around the edge of the cake. Repeat with 2 more layers. Brush the cut side of the reserved cake layer with the remaining syrup. Place the layer cut side down on top of the cake.
Frost the sides and top of the cake with the buttercream. Pat the coconut onto the sides of the cake and sprinkle the remaining coconut on the top of the cake.
Yup. That's a seriously long recipe. If you're brave and you try it, let me know how it turns out! 

Saturday, May 21, 2011

Mocha Icebox Cake, or, The Cream That Wouldn't Whip.


This cake was a near Asphalt Kitchen disaster. It turned out fabulously in the end, but not without some dramatics and a bit of scrambling around Boston.

Chalk it up to my waiting until the eleventh hour to get started. And to my stubborn attempt to get through the recipe without the aid of modern kitchen appliances, such as a mixer...

I was recently gifted a used hand mixer, which I conveniently left at my friends' house because it was too bulky to ride home on my bike with. Lesson about laziness learned! After twenty minutes of furiously whipping cream by hand with a whisk, I threw the first runny (and not remotely whipped) batch out in frustration.

I have whipped cream by hand without difficulty. It's always taken a while, but never before has it seemed impossible. As far as I can tell, I did all things properly this time. I chilled the bowl and whisk. I used very cold heavy cream. I whipped like the dickens. And it never formed peaks. It just looked like this:

Boo! That cream is totally not whipped!

So I trekked across the river, got the hand mixer (with whisk attachment), and started again. And it took two minutes to make whipped cream. And it was really easy.

Moral of the story: just use a darn mixer, if you have access to one.


In all seriousness, this cake is the bomb. I am a big fan of icebox cakes in general. I think they remind me of kid desserts, like Dirt Cups or Ghosts in the Graveyard. This one has just the right amount of coffee taste. It is mousselike and delicious, perfect for a birthday cake!


Mocha Icebox Cake
Adapted from Tara at Seven Spoons

Ingredients
  3 1/2 cups heavy cream, divided (and very cold)
  3/4 cups confectioner's sugar, divided
  1 1/2 tablespoons instant coffee granules
  a pinch of salt
  1 teaspoon vanilla extract
  Large box graham crackers, broken into squares (you'll need 45 total squares)
  1/3 cup chocolate syrup
  1/3 cup cocoa powder, sifted
  A small handful of shaved chocolate (I used a dark chocolate bar and shaved it with a cheese grater)

Preparation
  1. Line an 8X8 metal cake pan with cling wrap, crossed in both directions so that there is an overhang on all sides. Set aside.
  2. In a large, chilled bowl, begin to whip 2 cups of the cold heavy cream using a mixer with wire whisk attachment. Or do it by hand with a wire whisk, if you're better at whipping than I am! As soon as the cream begins to thicken, sift in 1/2 cup confectioner's sugar and add instant coffee granules and salt. Whip until the cream begins to hold soft peaks. Add in vanilla and whip until the cream just holds a stiff peak*
  3. Using a rubber or offset spatula, spread a small amount of the whipped cream on the bottom of the saran-wrap covered cake pan. Lay 9 crackers atop the cream side-by-side in a 3x3 grid. Spoon 1/2 cup whipped cream on top of the crackers and gently spread to cover the crackers entirely. Drizzle a few tablespoons of chocolate syrup over the cream.
  4. Top with another layer of 9 graham grackers, continuing the same layering pattern until you have 5 layers of crackers. Spread the last of the whipped cream onto the 5th layer of crackers, but leave off the chocolate.
  5. Cover the cake loosely with cling wrap, then draw the overhanging cling wrap up over the sides to cover all edges. Refrigerate for at least 6 hours and up to 2 days.
  6. At least an hour before serving, remove the cake from the refrigerator and peel back the cling wrap. Invert the cake onto a serving plate and carefully remove the remaining cling wrap. Smooth out the sides with your spatula, if needed. Place the cake in the freezer, uncovered, to chill for half an hour. 
  7. Meanwhile, prepare the cocoa cream. In the large, chilled bowl, begin to whip 1 1/2 cups of well-chilled heavy cream using a mixer with a wire whisk attachment. Or do it again by hand. As soon as it begins to thicken, sift in 1/2 cup confectioner's sugar and cocoa powder. Whip the cream until it just holds a firm peak*
  8. Take the cake out of the refrigerator and gently spread a layer of the cocoa cream to cover it as you would frosting. Decorate with shaved chocolate. Chill the finished cake in the refrigerator for at least 30 minutes, then serve.
*It's really easy to over-whip your cream and turn it right into whipped butter. Pay close attention to the cream and stop as soon as you like the consistency. 

Friday, May 13, 2011

Camp Bananas Foster(ish)


I can't lie. There is no true recipe to this dessert. I've made many versions of fried, caramelized, or otherwise fattened bananas. For some reason my brain wants me to use different ingredients and a different cooking approach each time I make the dish. I've also never once measured the ingredients. Not that this is a bad thing. Experimentation has taught me much of what I know about cooking. (It has also brought on its fair share of kitchen disasters.)

Usually when I get an idea, I just can't seem to let it go. This Saturday I was dead set on keeping ice cream frozen in the trunk of our car for two and a half hours. I don't know whether I wanted ice cream that badly or if I just wanted to prove a point, but somehow it worked. Nestled among cold beer and packed on ice in a hot/cold bag, my vanilla ice cream managed to stay just the right amount of frozen through a car ride from Cambridge to Foxboro and on into an hour of tailgating.


I think it was the ice cream dream that inspired the caramelized bananas, but it didn't hurt my cause that we had a brand new grill equipped with side burner. Which I was dying to test out. 

And test out I did. In a tiny camp saucepan, no less!


Due to the proximity of this saucepan to both a can of propane and several idling vehicles, I opted to forgo the traditional flambe procedure (and with it, the rum). Hence the "ish" in the recipe's title...


Camp Bananas Foster(ish)

Ingredients
 Four bananas, sliced lengthwise and halved
 3 tablespoons butter
 A handful (2/3 cup?) brown sugar
 A smaller handful (1/4 cup?) granulated sugar
 A splash of vanilla extract
 Several pinches (3/4 teaspoon?) ground cinnamon

Preparation
 1. Melt butter in saucepan or deep skillet over hot grill surface or burner.
 2. Stir sugars vanilla and cinnamon in to saucepan
 3. When mixture begins to bubble, add bananas and cook, tossing gently, until hot and lightly browned.
 4. Serve immediately with a scoop of vanilla ice cream

You can add rum, caramel, chopped walnuts, or anything your heart desires to this dish to make it extra special. 

Wednesday, March 23, 2011

The Cookies That Might Kill Me.

We have a little competition going on at work known fondly as "Cookie Madness". It is essentially a single-elimination cookie baking contest a la NCAA Men's Division I Basketball Championship. The seemingly harmless idea was devised out of boredom, but it quickly spiraled out of control into an intense competition.

As it turns out, my homemade oreos (adapted from Deb's recipe at Smitten Kitchen) have made it through to the semi-finals of competition. Yay me! Right? But what winning really means is I spent the last two hours mixing, baking, and frosting oreos for the third time in as many weeks. I have gone through eight sticks of butter and three bags of powdered sugar. Needless to say, I am tired of making homemade oreos.

What does this have to do with tailgating? Well, since I was fated to make these cookies again tonight anyways, I figured I may as well double the recipe and bring a batch to the AO Tailgate for the US v. Argentina match at Meadowlands this Saturday. And yes, that does mean I will miss the Revs home opener  (bummer, I know). For anyone making the trek to East Rutherford, stop by my car and help yourself to a cookie. Please. I can't look at these cookies any more.

Homemade Oreos
Adapted (slightly) from smittenkitchen.com
Where recipe was adapted from Retro Desserts, Wayne Brachman

Makes 18-20 Sandwich cookies (Deb's recipe said 25-30, so I must be making them big)

Ingredients
(by round three, it was a necessity.)
For the Chocolate Wafers:
   1 1/4 cups all-purpose flour
   1/2 cup unsweetened cocoa
   1 teaspoon baking soda
   1/4 teaspoon baking powder
   1/4 teaspoon salt
   1 1/4 cups sugar
   1 1/4 sticks (1/2 cup plus 2 tablespoons) room-temperature, unsalted butter
   1 large egg

For the filling:
   1/2 stick (1/4 cup) room-temperature, unsalted butter
   1/4 cup vegetable shortening
   2 cups sifted confectioners' sugar
   2 teaspoons vanilla extract

Preparation
  1. Set rack in the middle of the oven. Preheat to 375F.
  2. Preferably in the bowl of an electric mixer (although, if you're Bean, you do not own a mixer and you stupidly did this step by hand three times), thoroughly mix the flour, cocoa, baking soda and powder, salt, and sugar. With your mixer on low speed (or mixing arm on regular speed), add the butter, and then the egg. Continue mixing until dough comes together in a mass. You may want to use your hands to help form the dough.
  3. Take rounded teaspoons of batter and place on a nonstick baking sheet approximately two inches apart. With moistened hands, flatten the dough to about 1/8-1/4 inch thick. Bake for 8 minutes, rotating once to make sure cookies bake evenly. Set baking sheet on a rack to cool.
  4. To make cream filling, place butter and sugar in a mixing bowl and gradually beat in the confectioners' sugar and vanilla. Continue mixing by hand (or turn your fancy mixer on high and beat for 2-3 minutes) until filling is light and fluffy.
  5. To fill and assemble cookies, Deb recommended a pastry bag with a 1/2-inch round tip, but I used a dessert decorator like this one. Squeeze teaspoon-size blobs of filling onto the center of the flat side of one cookie. Place another cookie, equal in size to the first, on top of the cream. Lightly press while twisting to work the filling evenly to the outsides of the cookie. Continue this process until all the cookies have been sandwiched with cream. 

Related Posts Plugin for WordPress, Blogger...