Showing posts with label Sweets. Show all posts

Wednesday, May 4, 2016

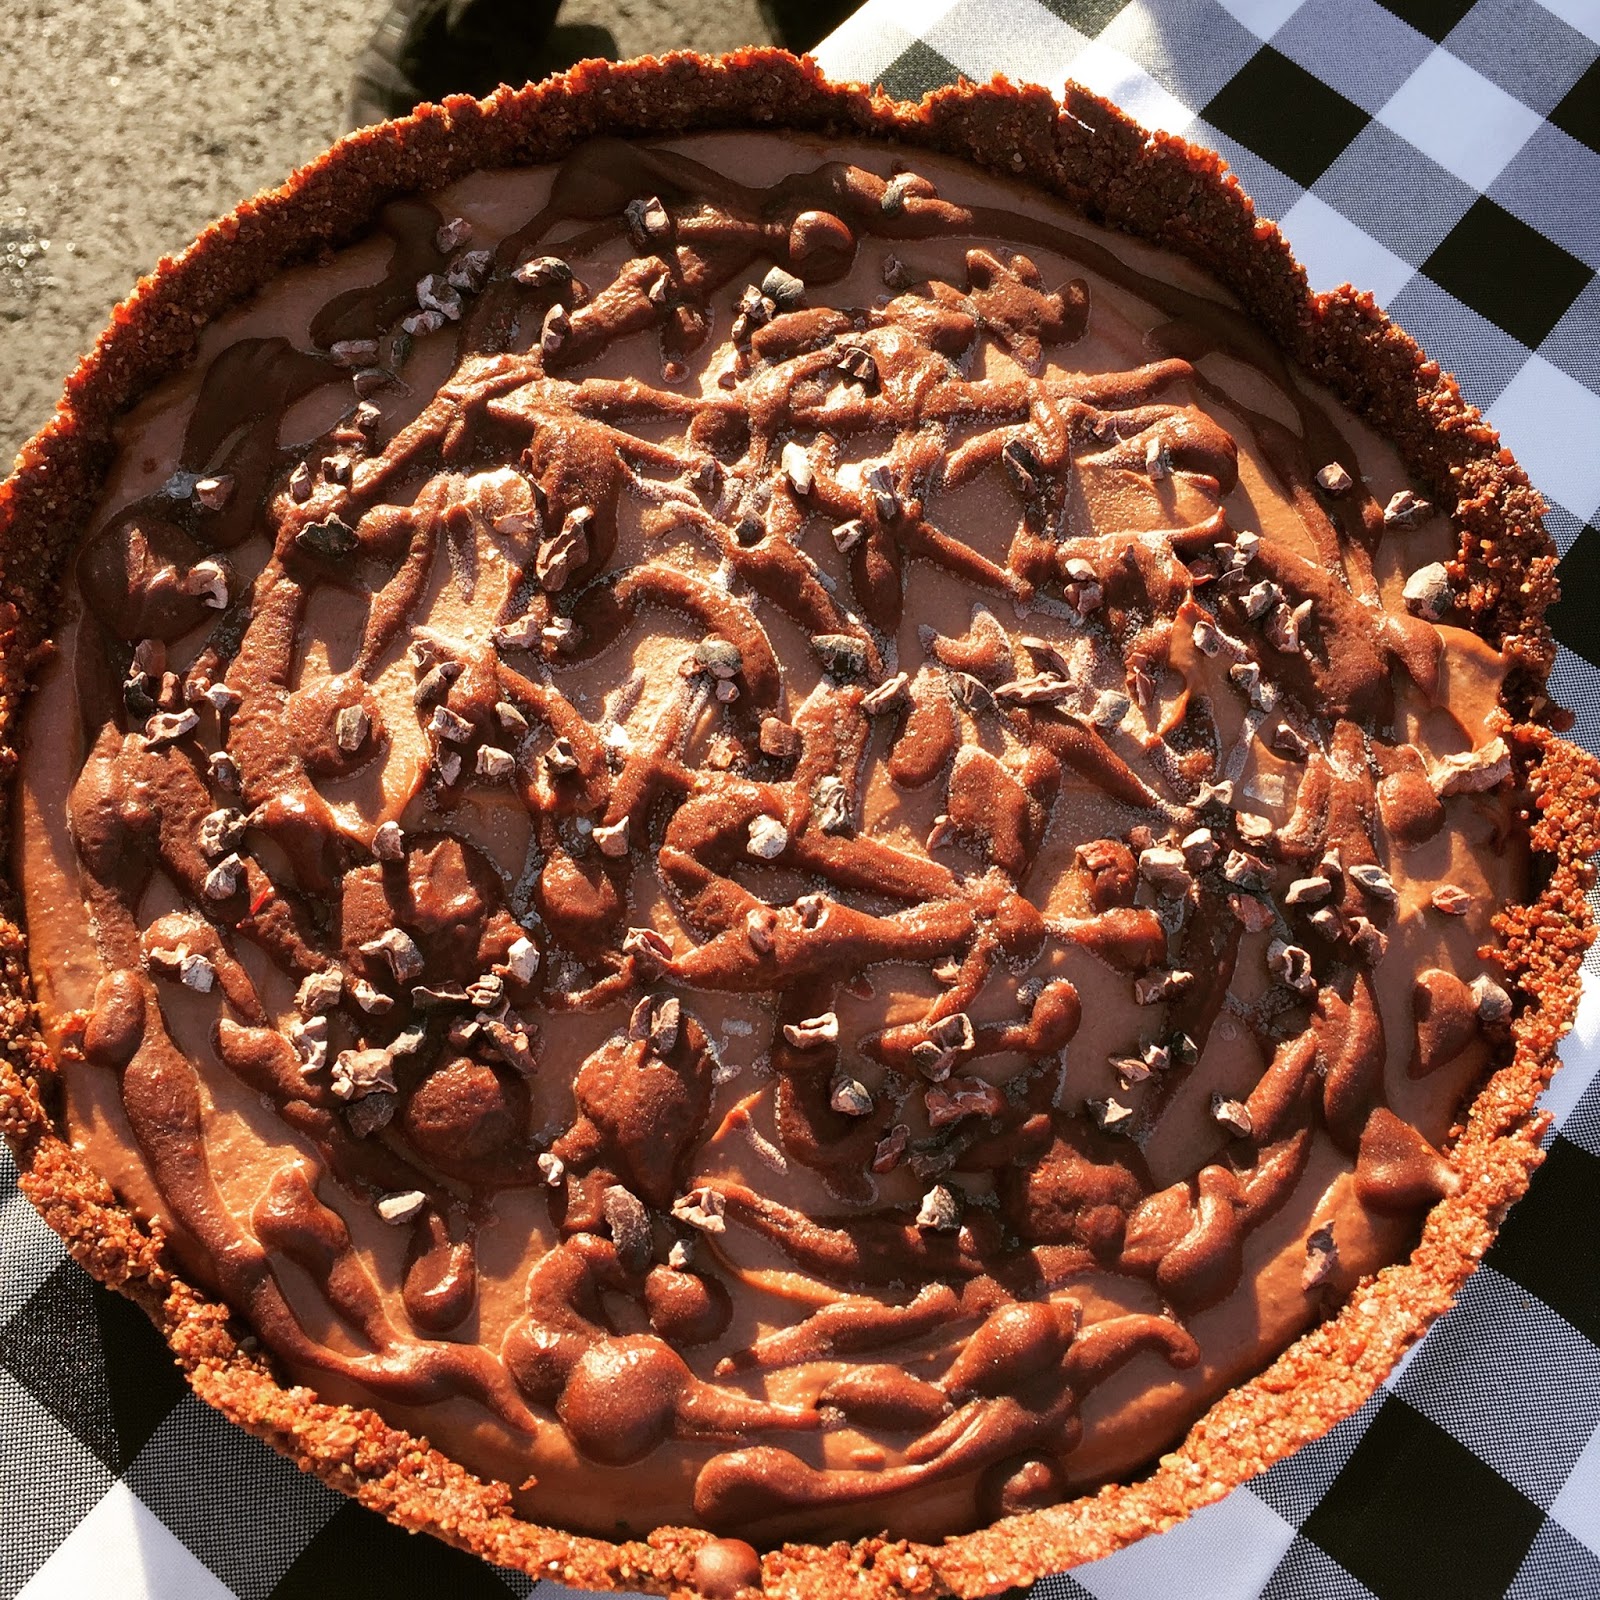
Recipe: Chocolate Peanut Butter Ice Cream Cake (Vegan + GF)


If you've read my blog before, you may know that I hate baking but I love pulling out the stops for a serious birthday cake.

There was Chris's 29th birthday German chocolate cake,


And his 30th birthday coconut layer cake.


There was Julie's vanilla buttercream cake.


I have no idea why I have no pictures of the finished cake product. But it was my first time using a Kitchenaid Mixer in all its glory. Man, did I hate those green grapes painted on my kitchen wall

Joe's mocha ice box birthday cake was served at a Revs tailgate.


Becca's funfetti birthday cake had all the sprinkles I could find in the store.


Never before have I attempted a vegan birthday cake! But a birthday needs a cake, even if the cake maker is dabbling in veganism.

I personally prefer ice cream cake over layer cake. I asked my parents for a Carvel cake for every birthday I can remember. So when I learned that Joe and Kyle would be traveling to Gillette Stadium for a New England Revolution game on Joe's birthday, I set out to make some semblance of an ice cream cake using no dairy.


I turned to the internet for guidance. What did you vegans do for inspiration before Google and Pinterest and Blogging? A quick Google search led me to Emily's recipe for deep dish chocolate peanut butter ice cream pie on her amazing blog This Rawsome Vegan Life. One look at her photographs and there was no turning back.

There is no baking involved in making this "ice cream" cake and it's made of pretty amazingly delicious real stuff. I modified Emily's original recipe only slightly, mostly because the spring form pan Steph loaned me was 9 inches and the one Emily used in her recipe was 7. You can adjust the crust and filling ratio as needed.


Chocolate Peanut Butter Ice Cream Cake (Vegan + Gluten Free)
Recipe adapted from This Rawsome Vegan Life
Makes one 9-inch cake (serves 10-12)

Ingredients
For the crust:
  • 1 1/3 cups pitted medjool dates
  • 2/3 cup hemp seeds
  • 1/3 cup flax meal
  • 1/3 cup almond meal
  • 3 tablespoons raw cacao powder
For the filling:
  • 4 frozen bananas
  • 1 1/3 cups pitted deglet or medjool dates
  • 2 cups raw cashews, soaked in water overnight
  • 2 tablespoons coconut oil
  • 1 1/4 cups almond milk (or non-dairy milk of choice)
  • 1/4 cup raw cacao powder
  • 2 tablespoons natural creamy peanut butter, plus a little extra for swirling in and topping. (My favorite brand is Teddie
For the chocolate sauce:
  • 2 tablespoons raw cacao powder
  • 2 tablespoons maple syrup
  • 1 tablespoon coconut oil

Cooking Directions
  1. Make the crust. Pulse the hemp seeds, flax meal, almond meal and 3 tablespoons cacao in a food processor until they become a rough flour. Add the dates and process until the mixture becomes sticky and soft. Press mixture into the bottom and up the sides of a spring form pan to make a uniform crust. Chill in the refrigerator.
  2. Make the chocolate sauce. In a small bowl, melt the coconut oil by microwaving for about 15 seconds. Whisk in the syrup and cacao powder until smooth. 
  3. Make the filling. Blend all filling ingredients until smooth, adding water or non-dairy milk as needed to achieve a creamy consistency. Spread filling evenly into your chilled crust, intermittently swirling in peanut butter and chocolate sauce. Drizzle peanut butter and chocolate sauce over the top of the cake. Place cake in freezer overnight or until frozen solid. When you're ready to serve, allow to thaw for a few minutes so the cake is creamy and easy to slice. Maybe eat it with some chili in a parking lot.

Saturday, May 16, 2015

Flour Bakery's White Coconut Cake with Coconut Frosting for a Big Birthday


I do not like baking.

I don't really even like cake. At our wedding last August, we served donuts and blueberry peach pie instead of wedding cake.

But a birthday? A birthday needs a cake. And a big birthday needs a big cake. So I baked a big coconut cake for Chris's 30th birthday.

Flour Bakery is a fantastic bakery and cafe in our neighborhood, and they make a mean coconut cake. Flour happens to peddle a baking cookbook, which also happens to contain a recipe for said coconut cake. So I turned to the pages of the Flour cookbook for this one. It was a labor of love, but the results were worth the effort. This cake is coconut on coconut. There is coconut in the cake batter itself and in the coconut butter cream frosting. It's serious business, but managed to taste light.


One of the reasons I've disliked baking cakes is that, more often than not, my cakes turn out looking very, very homemade. Which is really just a nice way of saying they're ugly.

As with most things in life, I've found that practice makes me better. Well, practice and refinement of approach make me better. Although it's time more time consuming than throwing together an ugly lopsided layer cake, following some of the tips from Deb's Smitten Kitchen Smitten Kitchen blog post on layer cake tips has been a game-changer. Top takeaway lessons from her post:

The freezer is your friend. Frozen cake layers are so much easier to work with. I made my cakes a day ahead of time, wrapped them tightly in plastic wrap, and nestled them in the freezer. This made for easy trimming and frosting when it was time to assemble the cake.


Level the cake layers. Trust me, your cake will look so much better. I used a long serrated knife to trim the curved tops off the frozen cake layers until I had nice, flat cakes for stacking.

Use a cake board. You can buy cardboard cake boards at party stores and bakeries or you can cut one out of an old cardboard box. Frosting and transport made infinitely easier.

Embrace the crumb coat. Oh, the crumb coat! Want your frosting to look smooth and beautiful? Spread a thin layer on the whole cake to seal in the crumbs, then refrigerate the cake for half an hour. When you go to frost the whole cake with a nice thick layer of frosting, marvel at how smoothly it goes on. How did I not know about this before?!


There are a few additional lessons I've learned on my own, through trial and error:

A kitchen scale is a wonderful tool. Precise measuring is imperative in baking (which is one of the reasons I don't like it). Not only does using a food scale take the guesswork out of measuring, is also means that I have fewer dishes to wash. When I baked this cake I simply kept adding ingredients to the bowl and zeroing out the scale between additions.

The KitchenAid Stand Mixer is worth it. I had no idea what I was missing out on until my brother bought me one as a Christmas present last year. For much of the year, it serves as a counter top decoration to fool my house guests into thinking I'm incredibly domestic. But for the few times a year when I bake, I am reminded why I'm willing to sacrifice precious city apartment kitchen counter space. How does it make the batter so nice?! I don't even have to scrape the bowl. Magic.


Follow the damn recipe. With cake baking, don't make your own substitutions. Follow the recipe exactly. If the recipe says to use cake flour, go buy cake flour. If you have to make changes, do the math. The exact math. I wanted to make 3 layers instead of 2 for a nice, tall cake that would feed a crowd. I increased all of my measurements by exactly 1/2.

As for the party? We rented out Ball Square Bowling, a small candlepin bowling alley near our home. It sure doesn't look like much from the outside, but it is one of the very best kept secrets around.


We brought a bunch of beer, had trays of food delivered by Mei Mei Street Kitchen, and bowled for 3 hours on a Saturday afternoon.


Sadly, the owner informed us that the bowling alley will be closing in the next year to make way for the Green Line Extension.

Here's the recipe for the cake!


White Coconut Cake with Coconut Frosting

Makes one 8-inch, 2-layer cake (serves 8-10)
Ingredients
  • 2 1/2 cups (270 grams) cake flour
  • 1 1/4 cups (250 grams) sugar
  • 2 teaspoons baking powder
  • 1/2 teaspoon kosher salt
  • 3/4 cup (1 1/2 sticks/170 grams) unsalted butter, at room temperature, cut into 2-inch pieces
  • 12 egg whites
  • 1 cup (240 grams) coconut milk*
  • 2 cups (240 grams) sweetened shredded coconut
  • 1 vanilla bean, split lengthwise
For the frosting:
  • 6 egg whites
  • 1 1/2 cups (300 grams) sugar
  • 1 1/2 cups (3 sticks, 342 grams) unsalted butter, at room temperature, cut into 2-inch pieces
  • 1 teaspoon vanilla extract
  • 1/4 teaspoon kosher salt
  • 2/3 cup (160 grams) coconut milk*
*1 14.5-ounce can of coconut milk should be enough, according to the notes in the cookbook.

Cooking Directions
  1. Position a rack in the center of the oven, and heat the oven to 350 degrees F. Butter and flour two 8-inch round cake pans, or line with parchment paper.
  2. Sift the cake flour into the bowl of a stand mixer fitted with the paddle attachment (or into a large bowl if using a handheld mixer). Add the sugar, baking powder, and salt and beat on low speed for a few seconds to combine. Add the butter pieces and beat on low speed for 45 seconds to 1 minute, or until the mixture is coarse and crumbly.
  3. In a medium bowl, combine the egg whites, coconut milk, and 1 cup (120 grams) of the shredded coconut and whisk until thoroughly mixed. Us the tip of a knife to scrape in the seeds from the vanilla bean into the coconut milk mixture. Whisk until the vanilla seeds are well dispersed.
  4. Add about half of the coconut milk mixture to the flour mixture and beat on medium-high speed for about 1 minute or until combined. Stop the mixer and scrape the sides and bottom of the bowl well. Add the rest of the coconut milk mixture and beat on medium speed for 20 to 30 seconds, or until the batter is well mixed, light, and fluffy. Divide the batter evenly between the prepared cake pans.
  5. Bake for 35 to 45 minutes, or until the tops are firm and golden brown and spring back when pressed lightly in the middle with a fingertip. Let cool completely in the pans on a wire rack. *Here's where I deviated from the recipe and made this a two-day cake event. I wrapped the cooled cakes in plastic wrap and placed them in the freezer overnight, then came back to them for trimming and frosting the next morning.
  6. To make the frosting: While the cakes are cooling, in a small heatproof bowl, whisk together the sugar and egg whites to make a thick slurry. Place the bowl over (not touching) simmering water in a saucepan and heat, whisking occasionally, for 6 to 8 minutes, or until the mixture is hot to the touch. It will thin out a bit as the sugar melts.
  7. Remove from the heat and scrape the mixture into the bowl of the stand mixer. Fit the mixer with the whip attachment and whip on medium-high speed for 6 to 8 minutes, or until the mixture becomes a light, white meringue and is cool to the touch. Turn down the speed to low and add the butter, a few chunks at a time. Increase the speed to medium and mix for 4 to 5 minutes, or until the butter is thoroughly incorporated and the frosting is smooth and glossy. It will look curdled at first, but down't worry. Keep whipping and it will come together.
  8. Add the vanilla extract, salt, and coconut milk and whip for another 1 to 2 minutes, or until the coconut milk is thoroughly incorporated and the frosting is smooth. You should have about 5 1/2 cups. (Use within 30 minutes, or transfer to an airtight container and store at room temperature for up to 1 day, then beat with the stand mixer fitted with the paddle attachment until smooth before using. Or, store in an airtight container in the refrigerator for up to 3 weeks, then bring to room temperature and paddle again for 6 to 8 minutes until smooth before using.)
  9. If you haven't already, remove the cooled cakes from their pans. Using a long, serrated knife, trim the top of each cake to level it. Place one cake layer on a cake plate. Spoon about 2 cups of the frosting on top and use an offset spatula to spread it evenly to the edges. Carefully place the second cake layer, top-side down (so the even, sharp edges will be on the top of the finished cake), on top. Spoon on about 1 cup of frosting and spread it over the top and down the sides of the cake, smoothing the frosting as well as you can and covering the entire cake with a very thin layer of it. This is the crumb coat, which will keep any loose crumbs from migrating to the surface of the finished cake. Place the cake in the refrigerator for about 30 minutes to firm up the crumb coat.
  10. Beat the remaining frosting (about 2 1/2 cups) briefly with a wooden spoon to keep it creamy. Spoon it on the cake (if desired, reserve a small amount for piping a decorative border) and spread it evenly across the top and down the sides. This is the finishing layer of frosting. Press the remaining 1 cup (120 grams) shredded coconut evenly onto the top and sides of the cake, covering the cake completely. As you work, hold the cake over a plate or bowl to catch the falling bits of coconut, so you can reuse them. Spoon any remaining frosting into a pastry bag fitted with a small round tip and pipe a decorative line along the top and/or bottom edge of the cake.
  11. The cake can be stored in an airtight container in a cool place for up to 3 days.


Wednesday, April 8, 2015

Almond Date Truffles


Let's talk about dates.

Not just any dates. Not your run-of-the-mill common date or deglet date. Not the kind of date that tastes fine enough but is really just a glorified raisin sold in a plastic pouch. I'm talking about the crown jewel of dates. I'm talking about medjool dates.


When I come across good ones at the store, I absolutely cannot resist buying. Amber brown, big and plump and sticky and sweet. Lots of athletic nutrition nerds hail them as "nature's fuel" because they're full of glucose for fast energy as a pre- or during-workout snack. I like to think that justifies me eating them like candy for an any-time-of-day snack.

I've been eyeing almond date ball recipes around the web for ages, but I've never gotten to testing one out. Probably because my dates never last long enough in the fridge to make their way into a recipe. There are tons of date ball recipes out there, and this recipe from Sara Forte at Sprouted Kitchen is a pretty classic version.

I saved mine to enjoy in celebration after Juan Agudelo's excellent goal in the New England Revolution's Saturday night win over Columbus Crew.


They're delicious. You should make some.


Almond Date Truffles
Makes 18
Recipe by Sara Forte, Sprouted Kitchen

Ingredients
  • 20 medjool dates, halved and pits removed
  • 1/2 tsp vanilla extract
  • 1/3 cup almond butter
  • 1/3 cup unsweetened shredded coconut
  • 1/3 cup natural cocoa powder (or cacao if you can find it)
  • 1/2 tsp salt
  • 1 tsp cinnamon
  • 1/3 cup toasted almonds, finely chopped
Preparation
  1. Put the dates and vanilla in a food processor and run until a chunky paste forms. Add the almond butter and pulse a few more times. Add the coconut, cocoa powder, salt and cinnamon, and pulse again. The mixture should be a tad crumbly, but press between your fingers and stick together. If it seems too wet to hold in a ball, add more coconut, if too dry, add a touch more almond butter or a splash of water. 
  2. Roll a heaping tablespoon of the mixture between your palms to form a ball. Repeat with remaining mixture. Put your chopped almonds on a plate and roll each truffle in the almonds (apply a bit of pressure to get them to adhere). Place the plate in the fridge to chill for at least an hour. Truffles will keep covered in the fridge for a couple weeks.
I rolled a few of my truffles in unsweetened coconut flakes instead of almonds. You could be creative here. I bet they'd taste great rolled in a mixture of cocoa powder, cinnamon, and a teeny pinch of cayenne pepper. Or in pistachios. Or sesame seeds. Or you could mix a little instant espresso powder in with the paste before forming balls. Possibilities are endless! 


Related Posts Plugin for WordPress, Blogger...